Skateboarding astronaut catOne-line
gpt-oss-120b
by OpenAIReasoningClean
Running live in a sandboxed frame. Click inside it before using the keyboard.
How it went
- Total time
- 1 min 48 s
- Cost
- $0.0050
- Output tokens
- 12,562
- Spent thinking
- 11,117 tokens
- Speed
- 117.9 tok/s
- Console errors
- 0
- First token after
- 1.5 s
- First visible text after
- 1 min 34 s
- Prompt tokens
- 411
- Code size
- 3.8 KB
- Finish reason
- stop
- Served by
- Sail Research
- Model id
openai/gpt-oss-120b- Reasoning sent
{"effort":"high"}- Max output
- 64,000 tokens
- Generated
- Nov 11, 2026
What it was asked
The prompt
“draw me an SVG of an astronaut cat skateboarding on the moon”
System prompt, sent with every prompt
You are generating a self-contained web demo. It will be rendered automatically in a sandboxed iframe and compared side by side with the output of other AI models given the exact same task.

Output rules:
- Reply with exactly ONE fenced code block containing the complete file: ```html (or ```svg when the task asks for an SVG). No text before or after the code block.
- Everything must be inline: CSS in <style>, JavaScript in <script>. No external files, images, fonts or network requests, except the CDN URLs explicitly allowed by the task.
- Do not use localStorage, sessionStorage, cookies, IndexedDB, alert(), confirm(), prompt() or window.open(): they are blocked in the sandbox and will throw.
- The page must look right in a 1280×800 viewport and adapt gracefully down to 375px wide. No horizontal scrollbar.
- Something meaningful must be visible on first paint: a screenshot is taken automatically about 3 seconds after load, without any interaction.
- Everything that makes the demo interesting must be visible within the first seconds: nothing hidden behind a high score, a later level or a long play session.
- Games must start in a self-playing demo mode (a simple AI plays) behind a "Click or press a key to start" message, so the game can be judged in action without playing.
- The iframe only receives keyboard events after the user clicks it: if the demo uses the keyboard, display a clear "Click or press a key to start" message.
- The code must run with zero errors in the console of the latest Chrome.
Code run-1.svg · 89 lines
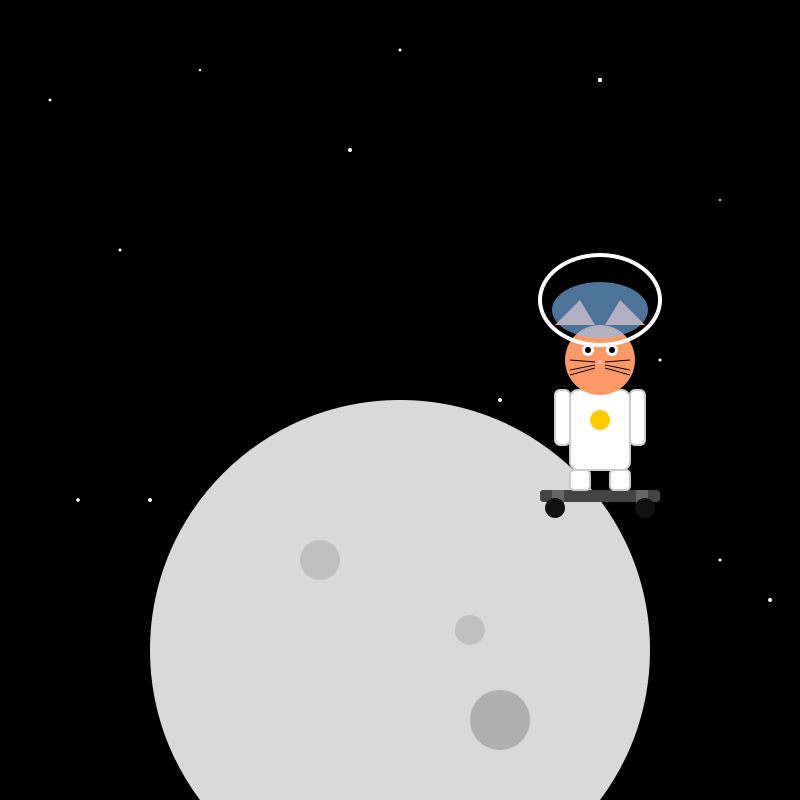
<svg xmlns="http://www.w3.org/2000/svg" viewBox="0 0 800 800" width="800" height="800">
  <!-- Background -->
  <rect width="800" height="800" fill="black"/>

  <!-- Stars -->
  <circle cx="50"  cy="100" r="1.5" fill="#fff"/>
  <circle cx="200" cy="70"  r="1.2" fill="#fff"/>
  <circle cx="350" cy="150" r="2"   fill="#fff"/>
  <circle cx="120" cy="250" r="1.5" fill="#fff"/>
  <circle cx="600" cy="80"  r="2.2" fill="#fff"/>
  <circle cx="720" cy="200" r="1"   fill="#fff"/>
  <circle cx="78"  cy="500" r="1.8" fill="#fff"/>
  <circle cx="500" cy="400" r="2"   fill="#fff"/>
  <circle cx="660" cy="360" r="1.5" fill="#fff"/>
  <circle cx="400" cy="50"  r="1.5" fill="#fff"/>
  <circle cx="770" cy="600" r="2"   fill="#fff"/>
  <circle cx="300" cy="600" r="1.5" fill="#fff"/>
  <circle cx="150" cy="500" r="2"   fill="#fff"/>
  <circle cx="720" cy="560" r="1.5" fill="#fff"/>
  <circle cx="250" cy="720" r="1.2" fill="#fff"/>
  <circle cx="580" cy="730" r="1.8" fill="#fff"/>
  <circle cx="430" cy="670" r="1.4" fill="#fff"/>

  <!-- Moon -->
  <circle cx="400" cy="650" r="250" fill="#d9d9d9"/>
  <!-- Craters -->
  <circle cx="500" cy="720" r="30" fill="#b0b0b0"/>
  <circle cx="320" cy="560" r="20" fill="#c0c0c0"/>
  <circle cx="470" cy="630" r="15" fill="#c0c0c0"/>

  <!-- Astronaut Cat on Skateboard -->
  <g transform="translate(600,330)">
    <!-- Skateboard -->
    <g id="skateboard">
      <!-- Deck -->
      <rect x="-60" y="160" width="120" height="12" fill="#444" rx="3" ry="3"/>
      <!-- Trucks -->
      <rect x="-48" y="160" width="12" height="20" fill="#666"/>
      <rect x="36"  y="160" width="12" height="20" fill="#666"/>
      <!-- Wheels -->
      <circle cx="-45" cy="178" r="10" fill="#111"/>
      <circle cx="45"  cy="178" r="10" fill="#111"/>
    </g>

    <!-- Cat -->
    <g id="cat">
      <!-- Torso -->
      <rect x="-30" y="60" width="60" height="80" fill="white" stroke="#ccc" stroke-width="2" rx="8" ry="8"/>
      <!-- Arms -->
      <rect x="-45" y="60" width="15" height="55" fill="white" stroke="#ccc" stroke-width="2" rx="5" ry="5"/>
      <rect x="30"  y="60" width="15" height="55" fill="white" stroke="#ccc" stroke-width="2" rx="5" ry="5"/>
      <!-- Feet -->
      <rect x="-30" y="140" width="20" height="20" fill="white" stroke="#ccc" stroke-width="2" rx="4" ry="4"/>
      <rect x="10"  y="140" width="20" height="20" fill="white" stroke="#ccc" stroke-width="2" rx="4" ry="4"/>

      <!-- Head -->
      <circle cx="0" cy="30" r="35" fill="#ff9966"/>

      <!-- Ears -->
      <polygon points="-20,-30 -45,-5 -5,-5" fill="#ff9966"/>
      <polygon points="20,-30 5,-5 45,-5" fill="#ff9966"/>

      <!-- Eyes -->
      <circle cx="-12" cy="20" r="6" fill="white"/>
      <circle cx="-12" cy="20" r="3" fill="black"/>
      <circle cx="12" cy="20" r="6" fill="white"/>
      <circle cx="12" cy="20" r="3" fill="black"/>

      <!-- Nose -->
      <polygon points="0,30 -3,34 3,34" fill="pink"/>

      <!-- Whiskers -->
      <line x1="-5"  y1="35" x2="-30" y2="40" stroke="black" stroke-width="1"/>
      <line x1="-5"  y1="38" x2="-30" y2="45" stroke="black" stroke-width="1"/>
      <line x1="-5"  y1="32" x2="-30" y2="30" stroke="black" stroke-width="1"/>
      <line x1="5"   y1="35" x2="30"  y2="40" stroke="black" stroke-width="1"/>
      <line x1="5"   y1="38" x2="30"  y2="45" stroke="black" stroke-width="1"/>
      <line x1="5"   y1="32" x2="30"  y2="30" stroke="black" stroke-width="1"/>

      <!-- Helmet (white outline) -->
      <ellipse cx="0" cy="-30" rx="60" ry="45" fill="none" stroke="white" stroke-width="4"/>
      <!-- Visor (light blue, slightly transparent) -->
      <ellipse cx="0" cy="-20" rx="48" ry="28" fill="#80c0ff" opacity="0.6"/>

      <!-- Chest patch (optional) -->
      <circle cx="0" cy="90" r="10" fill="#ffcc00"/>
    </g>
  </g>
</svg>
Reasoning trace (11,117 tokens)
The user wants an SVG of an astronaut cat skateboarding on the moon. This is a request to draw an SVG. According to the developer instructions, we should output exactly one fenced code block containing the complete file: ```svg. Should be a single fenced code block with language type "svg". The content should be a valid SVG representing an astronaut cat skateboarding on the moon. The SVG must have everything inline (SVG is self-contained). No external resources. Should be visible on first paint, i.e., the content should be visible directly. The code must run without errors.
Therefore, we need to produce an SVG that draws an astronaut cat (cat wearing astronaut helmet / suit?) skateboarding on the moon (maybe a crescent shape for the moon, some craters). Should be interesting and recognizable.
We cannot embed raster images; only vector shapes. We can use path data. We need to think about composition: - a dark background representing space? Usually we can have black background. - the moon: maybe a circle or ellipse with crater shapes. - an astronaut cat: cat head with whiskers, ears, big eyes, wearing helmet with visor. A suit. cat body maybe in a stylized cartoon form. - a skateboard: maybe a deck rectangle, wheels, trucks.
We need to ensure that the SVG is self-contained. Use viewBox for scaling. Use responsive. Should have dimensions like width=400 height=400 maybe. Use a viewBox like "0 0 200 200". The moon can be a large circle near bottom left maybe. The cat can be positioned on the moon surface. The skateboard-shaped deck beneath the cat's feet.
We should also consider the requirement of being visible on first paint; the SVG should show everything.
We need to see the instructions: "Everything must be inline: CSS in <style>, JavaScript in <script>. No external files, images, fonts". However, for SVG, CSS can be included inside <style> tags inside <svg>. That's fine.
So we produce a single fenced block: ```svg ... ``` with the full SVG markup.
The specification: The user said "draw me an SVG of an astronaut cat skateboarding on the moon". They didn't request interactivity; just a static rendering. So just the SVG.
Potential features: The cat wearing a space suit, with a helmet: a large circle for head, ears as triangular shapes, helmet as a larger circle or oval, with a visor. The cat body in a purple or white suit, maybe stripes. The skateboard: deck as a black rectangle with wheels.
The moon background: a dark space background? Could set the outer rectangle as black? For SVG you can set a dark background via rect.
But typical about using space as background: black rectangle covering whole viewBox. Then the moon: a light grey circle with craters.
The cat: position near the right side of the moon.
Make it cartoonish.
Let's design the composition:
SVG size: width=600 height=600 viewBox=0 0 600 600.
Space: use black rectangle covering full.
Moon: large circle with center (300, 400), radius 200. Fill: #F5F5DC (moon color). Add some craters: smaller circles with gray.
Astronaut cat: positioned on top of moon (maybe mid-level on the moon circumference). But easier: place cat at coordinates: say mount on the moon's surface (on right side). For simplicity, we could place cat and skateboard floating above the moon like it's skating on the lunar surface.
But to show the cat is skateboarding on the moon, we need to indicate that the cat is on the moon's surface, not floating with a cable.
Thus, we draw the moon as a circle and then place the cat on the near side (the lower part of the circle). For simplicity, we might draw the cat on top of the moon's surface a bit offset above the horizon.
Better approach: use a moon shape like a circular shape partially covering a background. And cat stands on the top right portion of it.
Alternatively, draw the moon as a disc partially showing only the "ground". Use perspective? Keep it simple: transform cat's y position to be near the bottom of the moon's disc.
We can also draw the moon's surface as a curved shape (like a partial circle). This ensures cat stands on a surface line. There can be an "arc" representing horizon.
Because the cat is cartoon, we can even simplify: just put cat perched on the upper left side of the moon but with skateboard beneath them; the illusion of skating.
We'll create a cat body: small oval head, ears, head inside helmet. Let's think drawn details.
Simplify: define a group <g class="cat"> with shapes:
- Helmet: large oval shape: path or ellipse.
- Head: cat face: circle within the helmet.
- Ears: triangles.
- Eyes: two circles.
- Whiskers: lines.
- Body: main suit as a rectangle.
- Arms: simple shapes.
- Leg: two circles for feet on the skateboard.
- Skateboard: deck rectangle, wheels circles attached.
We'll make everything stylized. Use consistent colors: helmet white, visor gray, suit orange/white, shoes black.
Better to pick a color palette: Space suit: white with orange accents. Cat: cat fur maybe orange (like a ginger cat). Helmet: white. Visor: tinted blue.
Make the cat's face visible: maybe use simple features: eyes at 2 elliptical shapes, nose triangle.
Will have to decide to keep paths simple.
We need to ensure all shapes are drawn correctly with correct coordinates.
We can write the SVG manually. Let's define the viewBox "0 0 800 600" (wider). Place space background as black rect.
The moon: positioned left side, near bottom, radius 300 (center at (200, 600) i.e., bottom-left half out). That with radius 300 will have visible portion of circle as a horizon.
Let moon center: (200, 800) with radius 300 (makes top part visible above y=0). But viewBox height 600, so we can't go beyond. Actually let's set moon center at (200, 600) radius 300 -> top is at y=300, bottom at y=900 out of view. So we see the top half of the moon arc.
Yes, we have viewBox height maybe 600: the visible portion of the moon is the top half from y=300 to y=600. That would be a big semicircle at the bottom left like a horizon.
If we have the cat near the right side of the arc, like on the right side.
We can also place a small illuminated part of the moon like a crescent.
Alternatively, just place a full circle partially clipped.
Better to just draw a full circle with a radial gradient to show moon. But we can just use a full circle.
Simplify: draw a circle at (400, 550) radius 200 for the moon. That will be partially off-screen bottom.
Newton: Might be easier to just draw a full moon as circle near bottom, and cat placed on top of it.
We'll set viewBox: 0 0 800 800.
Space background: black rectangle.
Moon: <circle cx="400" cy="650" r="250" fill="#d9d9d9"/>. This extends beyond bottom maybe, but visible top part.
Now cat at coordinates: we need to place on top of the moon near a point on circumference. If the moon is at (400,650) radius 250. The surface is at points where y = 650 - sqrt(r^2 - (x-400)^2). For x approximated near 600? For x=600, sqrt(250^2 - (200^2)) = sqrt(62500 - 40000) = sqrt(22500) = 150. So y = 650-150 = 500.
Thus at (600,500) on the top-right curvature. Let's place the cat's feet at (600,500). Cat body around that.
So the cat's foot positions for skateboard: we can place skateboard deck as rectangle maybe width = 100, height = 10. Place deck under cat's feet.
Better to approximate: the deck center at (600,520) (just a bit above cat's foot?). Actually cat foot may be at the deck; deck should be below cat lower body. Might be easier: define deck at (550,530) i.e., rectangle from x=550 to x=650, y=530-540. The cat's legs will be at positions near foot.
Ok.
Now for cat shape: we can approximate as:
- Helmet: outer: ellipse centered at (600,460), width=120, height=80, fill white.
- Visor: ellipse centered same but same size? Actually inner shape: convex path to look like visor: an ellipse with fill #a0cfe9 (light blue), maybe offset slightly.
- Head: circle of radius 30 at center (600,455) maybe edge of helmet. But the cat's head will be inside helmet: so a circle of radius 30 at (600,450) filled orange (cat fur). Ears: triangles above head.
Actually we can incorporate ears as path shapes.
Simplify: make cat's head as orange circle partially visible inside helmet: we can draw a orange circle (cat head) and ears as small triangles from top of circle. Then the helmet covers partially above; we can use shape ordering: helmet outer is first, and ears and head placed after or before?
Better: create helmet outer as a thick stroke ellipse to represent the helmet's rim, and visor as filled shape covering front.
Simplify further: Not too realistic; as the user maybe expects a stylized cartoonally drawn.
Thus, design steps:
- Draw background (black), maybe stars as small circles.
- Draw moon: lighten circle.
- Draw skateboard: deck rectangle (dark shape), trucks (small rectangles), wheels (circles).
- Draw astronaut cat: a cat wearing a suit with helmet.
We can create a group for cat: <g id="cat">
Inside cat group:
- Body: a rectangle for suit (white or orange) from (560,460) width=80 height=70.
- Arms: lines extended.
- Head: cat head circle (radius = some) overlayed on helmet.
- Helmet: outer shape: ellipse (same size as suit's head part). Let's think.
Approach: Could also just create a simple cat: head with ears, body rectangle, lines for legs. Over that, add a white oval for the helmet with black border. Inside that, draw a visor.
But we need to show the cat wearing the helmet. (The cat head may be within the helmet). The visor may be drawn as blue shape.
Simplify: draw a white ellipse (helmet) that encloses the cat's head. Cat head is an orange circle inside the helmet but may be partially covered. The helmet also has a facegrid? Not needed.
Better: do not overcomplicate: The cat will have a white helmet (outer ellipse) with a blue visor. The cat's head (orange circle) visible below visor at lower part of helmet. Ears may be protruding above helmet.
Now we need to define shapes intimately.
Let's plan coordinates more concretely: Let's set cat coordinate system with origin at (600,460) maybe.
Define cat group at transform translate(600,460) and then inside draw relative shapes.
But more control may be easier.
Let cat group transform: <g transform="translate(600,460)">. Then inside we can define shapes at coordinates relative to this.
Define cat blueprint:
- Helmet outer: <ellipse cx="0" cy="-20" rx="60" ry="40" fill="white" stroke="gray" stroke-width="2"/>. This draws a helmet slightly above the cat's head.
- Visor: <ellipse cx="0" cy="-10" rx="50" ry="25" fill="#80c0ff" opacity="0.7"/>.
- Head: <circle cx="0" cy="30" r="35" fill="#ff9966"/> (orange). This will be partially inside helmet.
- Ears: two path shapes triangles. Use points e.g., left ear: polygon points [-15,30] [-25,10] [-5,10]; right ear: [15,30] [25,10] [5,10]. Actually need x coordinate relative to center.
But note that head's center is at y=30 below the helmet center? Actually we placed helmet center at y=-20 (so helmet top). Then head center at y=30 relative to cat group coordinate.
We should adjust: cat group origin currently at (600,460). So the helmet center at y=-20 relative to group (i.e., at 440 absolute), head center at y=30 relative (490 absolute). That may be okay.
Now draw body: perhaps a rectangle for torso. Let's set torso rectangle: <rect x="-30" y="65" width="60" height="80" fill="white" stroke="#ccc" stroke-width="2" rx="8" ry="8" />. That's the suit.
Arms: could be lines or rectangles: left arm: <rect x="-45" y="65" width="15" height="60" fill="white" stroke="#ccc" stroke-width="2" rx="5" ry="5"/>. Right arm: <rect x="30" y="65" width="15" height="60" fill="white" stroke="#ccc" stroke-width="2" rx="5" ry="5"/>.
Legs: maybe not needed because skateboard. But we can add foot shapes: small ovals at bottom.
Skateboard: not part of cat group but separate near foot position.
But we need to place skateboard appropriately under cat's feet. Since cat's legs end at around y=65+80 =145 relative to group. So feet at around y ~145. We'll place skateboard deck at relative coordinates: deck rectangle at x offset maybe -50 to +50, at y around 145+10? Let's calculate.
Alternatively, we extend cat group to include skateboard as part of group to be placed together.
Because the cat is supposed to be on the skateboard, better group them: <g id="cat-skateboard"> containing cat group and skateboard group, both located relative to group.
Thus, group transform at (600,460). Then inside cat group and skateboard group positioned.
Now, we need to decide lineup.
Let's set cat group inside with shape positions as defined. Then skateboard group with deck and wheels. For deck: <rect x="-55" y="150" width="110" height="10" fill="#444" rx="2" ry="2"/> (centered horizontally). Wheels: two circles at either end: left wheel: <circle cx="-45" cy="165" r="8" fill="#222"/>; right wheel: <circle cx="45" cy="165" r="8" fill="#222"/>. Probably also trucks: small rectangle between them but there is no need.
Now we need to adjust coordinates to shape cat's feet relative to deck so they appear to be on it. The cat's lower body (torso) extends down to around y=65+80=145 (relative). The deck top is at y=150, deck is at 150. So cat's lower part is only 5 units above deck, not looking like cat is standing on deck. Instead we want cat's lower body just slightly above deck. We could shift deck slightly down to 160. Let's set deck at y=170 maybe to ensure cat's legs appear on it.
Let's adjust: deck: y=170 (top). Then wheels at y=185 etc.
We can also draw cat's shoes: small ovals or rectangles at foot positions maybe around y=170 relative.
Better to just have cat's lower torso at about y=140 and deck at y=150, making cat standing on deck.
Doc: Let's decide final coordinate mapping:
Group's origin at (600, 460) world coordinate.
Cat body coordinates:
- Helmet outer: <ellipse cx="0" cy="-30" rx="60" ry="40" fill="white" stroke="gray" stroke-width="2"/>.
- Visor: <ellipse cx="0" cy="-20" rx="50" ry="25" fill="#80c0ff"/>.
- Head: <circle cx="0" cy="25" r="35" fill="#ff9966" stroke="none"/>.
- Ears: left ear: <polygon points="-20,30 -35,10 -5,10" fill="#ff9966"/>; right ear: <polygon points="20,30 35,10 5,10" fill="#ff9966"/>.
- Torso: <rect x="-30" y="60" width="60" height="80" fill="white" stroke="#ccc" stroke-width="2" rx="8" ry="8"/>.
- Arms: left arm: <rect x="-45" y="60" width="15" height="55" fill="white" stroke="#ccc" stroke-width="2" rx="5" ry="5"/>; right arm: <rect x="30" y="60" width="15" height="55" fill="white" stroke="#ccc" stroke-width="2" rx="5" ry="5"/>.
- Legs / feet: to show contact with deck.
We can add foot shapes: like small ovals at bottom of torso where the cat's legs would be. Actually we can add two rectangles at bottom left and right: left leg: <rect x="-30" y="140" width="20" height="20" fill="white" stroke="#ccc" stroke-width="2" rx="4" ry="4"/>; right leg: <rect x="10" y="140" width="20" height="20" fill="white" stroke="#ccc" stroke-width="2" rx="4" ry="4"/>.
Okay the torso's bottom is at y=60+80=140. So leg shapes start at y=140.
Alternatively, have legs overlapping deck. We'll place deck at y=160 to align nicely.
Thus:
Deck: <rect x="-60" y="170" width="120" height="10" fill="#333" rx="2" ry="2"/>.
Wheels: left wheel: <circle cx="-45" cy="185" r="8" fill="#111"/>; right wheel: <circle cx="45" cy="185" r="8" fill="#111"/>.
Optional trucks: small rectangles linking wheels.
Now add details: maybe we can add a small star background: randomly place white small circles (stars) on black background.
Add CSS to apply simple shadows or gradient.
We can embed style within <svg> to style shapes.
Alternatively, just apply fill directly.
But the instruction says "everything must be inline: CSS in <style>, JavaScript in <script>." For an SVG file, can add <style> inside <svg> to style classes. Might not be needed but maybe we can style star twinkling by animation? Might be overkill.
Simplify: static design.
But require visualization on first paint: everything visible.
Make sure to set preserveAspectRatio to meet viewport.
Set viewBox=0 0 800 800.
Make width=100% height=100% perhaps.
Implementation details:
<?xml version="1.0" encoding="UTF-8"?> optional.
But recommended to start with <svg ...>.
Full code:
<svg xmlns="http://www.w3.org/2000/svg" viewBox="0 0 800 800" width="800" height="800" style="background: black;">
Then add stars: we can generate a few circles with random positions using <circle>. Could embed 30 stars.
Simplify: static stars coordinates.
Add moon: circle with fill "#d9d9d9". Optionally add gradient.
Add cat+skateboard group: <g transform="translate(550, 500)">. Wait earlier we set group at (600,460), but we can adjust to align cat on moon's surface precisely.
We need to consider location on moon's surface. If moon's center at (400,650) radius 250, then surface point at around (650,500) maybe. Let's compute better:
For moon at cx=400, cy=650, radius=250: x coordinate of surface near right side: x around 600? Actually compute intersection of a point on the surface with given x more realistic: Choose x=600, then dx=200, test if points exist: y = cy - sqrt(r^2 - dx^2) = 650 - sqrt(250^2 - 200^2) = 650 - sqrt(62500-40000) = 650 - sqrt(22500) ≈ 650 - 150 = 500. So point (600,500) on surface.
Thus we want cat's feet about at (600,500) maybe. The cat's base is at about y=170 relative inside group? Actually group transform location sets the origin at top-left of cat's group. In our earlier plan, we placed cat group at origin of group at (600,460). Inside group, the cat's lower foot shape at absolute y approx group origin + leg y positions. The leg shape is at y: torso bottom 140. The foot bounding box extends to y+20 (i.e., 160). Deck at y=170. So foot top at 140, foot bottom at 160 relative group. The group origin y=some coordinate; we need to set group origin so that foot bottom (around y 170) aligns with moon's surface y=500. So group origin Y = 500 - 170 = 330. So group transform y = 330.
Similarly, x coordinate: we need cat's foot horizontally around x=600. Our central axis of cat is at x=0. The deck extends from x=-60 to +60 (i.e., width 120). So cat's leftmost foot is around -30 maybe. The central axis at x=0 corresponds roughly to cat's torso center; expecting it to align with the center of deck. The cat's central axis position should be near x=600. So group origin X = 600.
Thus transform translate(600,330). But in our earlier coordinates, we had group origin at (600,460). That's too low. Let's adjust.
Better reposition group accordingly: set group transform "translate(600,330)". Then all internal coordinates remain as defined.
But verify that deck top y=170+? Actually deck's y=170. At group origin Y=330, absolute Y = 330+170=500. That's exactly foot contact? Actually top of deck at y=500 absolute (maybe deck top but cat foot is at 140-160). Wait the foot shape's bottom is at about y=160 relative to group (foot rectangle from y=140 height20). So foot bottom absolute = 330+160 = 490. That's slightly above deck top: 500. So foot appears just above deck. Good.
Will cat appear perched on deck. But also need to withdraw the cat's lower torso? At y=140 to 160 region, there is foot shape that maybe overlaps deck. To show cat standing on deck (skateboard), foot shape could be placed at same y as deck top. So either move foot bottom down to align with deck top.
Let's compute deck top Y: 330 + deck Y coordinate (170) = 500. So deck top absolute =500. For foot rectangle that starts at y=140 (relative) and height 20, foot top absolute = 330+140 = 470. foot bottom absolute = 330+160 = 490. So foot bottom is 10 units above deck top (500). That's okay, cat's foot not touching deck fully but maybe top of deck will be visible.
We might want foot top close to deck top to appear standing on deck. Could move deck up by 10 units: deck y=160 -> at absolute = 330+160=490. Then foot bottom (490) touches deck top (490). That aligns them. So set deck y=160.
Now deck top at 490. So reposition deck shape to y=160, width still 120, height as before. Wheels at maybe y=175.
Adjust wheels accordingly: if deck top at y=160+10 = 170 relative (since deck height 10). Wheel center Y maybe at 170+12 = 182? Or something.
Simplify: deck rectangle: <rect x="-60" y="160" width="120" height="12" fill="#333" rx="2" ry="2"/>. Then wheel centers at ( -45, 178 ) and (45, 178 ) with radius 10 maybe.
Thus set wheel Y=178.
Now foot rectangle bottom at y=160 (since foot rectangle height is 20 from y=140), foot bottom = y=160 above deck top at y=160. Actually foot rectangle extends to y=160, which coincides with deck top (the deck's top edge) if deck starts at y=160. That yields foot touching deck.
But to give more realistic impression, the foot might appear to be attached to the deck from above; we can just make that.
Thus deck Y=160.
Now the cat coordinates:
- Torso rectangle: x=-30, y=60 height=80 results in bottom at y=140. So foot rectangle from y=140 to 160.
Thus foot rectangle top =140, foot rectangle height =20.
Thus foot bottom =160 as above.
That's fine.
Now the deck rectangle top Y=160. So deck sits right below foot rectangle; foot leaves no gap.
Now the deck height = 12 or maybe 8. The deck's top at y=160, bottom at y=172.
Thus foot rectangle is overlapping with deck's top? Actually the foot rectangle's bottom at y=160 exactly matches the deck's top. However shapes drawn later may overlap: foot rectangle drawn before deck will be covered partially by deck if deck is drawn later. So ordering matters: we want foot visible above deck (like foot on it). If we draw foot rectangle before deck (foot first) then deck above foot will obscure foot's bottom line. Might be okay. Prefer foot drawn after deck to be above deck (so foot visible above). But foot is part of cat group which we could position after deck group.
Simplify: Draw deck and wheels first, then cat group.
Thus the structure: <g transform="translate(600,330)">
<g id="skateboard">
<rect x="-60" y="160" ... />
<circle ... />
</g>
<g id="cat">
... cat shapes (including foot rectangle) ...
</g>
</g>
That order ensures foot drawn after deck.
Now define cat shape in detail.
The cat head and helmet entire shape: Let's draw helmet outer ellipse with rx=60, ry=45 maybe. Slightly larger.
But note that all shapes are relative. Let's set all positions relative to group.
Define helmet outer ellipse: <ellipse cx="0" cy="-30" rx="60" ry="45" fill="#f2f2f2" stroke="#999" stroke-width="2"/>. Color whiteish.
Visor: <ellipse cx="0" cy="-20" rx="45" ry="25" fill="#99cfff" opacity="0.8"/>. Or use a slightly different shape.
Now cat head: <circle cx="0" cy="30" r="35" fill="#ff9966" stroke="none"/>.
Make ears: left ear polygon points at appropriate coordinates relative to cat head: left ear at left of head. Points: tip of ear at approx (-25,20), base left at (-40,5), base right at (-10,5)? Actually ears need to be placed above head. The head center is at y=30. So top of head is y=30-35= -5. Ears top extends beyond that maybe up to -30. So define left ear: tip at (-25, -30), base left at (-40, -5), base right at (-10, -5). Right ear similarly mirrored.
Thus left ear: <polygon points="-25,-30 -40,-5 -10,-5" fill="#ff9966"/>. Right ear: <polygon points="25,-30 40,-5 10,-5" fill="#ff9966"/>.
But note that cat head center relative coordinate is at y=30; top of head is at y=-5; ears tip at -30 extends above both helmet? But helmet outer ellipse has center at y=-30 and ry=45 -> covers from y=-75 to y=15. So ears will be inside helmet shape at top especially behind? We'll see.
But perhaps we want ears to be visible protruding above helmet? In astronaut helmets, ears are covered by helmet, not protruding. But cat ears may be inside helmet. It's fine.
But to show it's a cat, maybe hatched ear ears inside the helmet (just visible through visor). Might be okay.
Better not overthink.
We can also include whiskers: three lines per side from cat's face.
Add lines: <line x1="-15" y1="45" x2="-40" y2="55" stroke="#000" stroke-width="1"/> etc. Simplify.
But also need to show cat's suit details: maybe a patch on the chest. Could add a circle or shape.
We can also add a patch with a NASA-like flag, but not needed.
Now some stars: Good to add stars.
Implementation details:
Write the <svg> with black background. Then add <defs> for optional gradient.
Add <style> with some CSS for classes maybe. Not needed but can be used for star twinkling.
Simplify: static.
Now code: Let's write step by step.
Start:
<svg xmlns="http://www.w3.org/2000/svg" viewBox="0 0 800 800" width="800" height="800" style="background:black">
Add <defs> if needed.
Add stars:
Define <g id="stars"> <circle .../> repeated maybe 30 times with random positions (x: random within 0-800; y: random within 0-800) with radius random between 1-3, fill white with slight opacity.
But we could just hardcode a few.
Let's generate simple star fill.
I'll create an array manually: Use circles at positions manually.
Simplify: write a few star circles:
<circle cx="50" cy="100" r="1.5" fill="#fff"/>
<circle cx="200" cy="70" r="1.2" fill="#fff"/>
<circle cx="350" cy="150" r="2" fill="#fff"/>
<circle cx="120" cy="250" r="1.5" fill="#fff"/>
<circle cx="600" cy="80" r="2.2" fill="#fff"/>
<circle cx="720" cy="200" r="1" fill="#fff"/>
<circle cx="78" cy="500" r="1.8" fill="#fff"/>
<circle cx="500" cy="400" r="2" fill="#fff"/>
<circle cx="660" cy="360" r="1.5" fill="#fff"/>
<circle cx="400" cy="50" r="1.5" fill="#fff"/>
<circle cx="770" cy="600" r="2" fill="#fff"/>
<circle cx="300" cy="600" r="1.5" fill="#fff"/>
<circle cx="150" cy="500" r="2" fill="#fff"/>
<circle cx="720" cy="560" r="1.5" fill="#fff"/>
Add more stars optional.
Now add moon:
<circle cx="400" cy="650" r="250" fill="#d9d9d9"/>
That's a light grey moon.
Add small craters: <circle cx="500" cy="720" r="30" fill="#b0b0b0"/>; <circle cx="320" cy="560" r="20" fill="#c0c0c0"/>; <circle cx="470" cy="630" r="15" fill="#c0c0c0"/>.
Now add cat+skateboard group.
<g transform="translate(600,330)">
Inside group:
First skateboard.
<g id="skateboard">
<rect x="-60" y="160" width="120" height="12" fill="#444" rx="3" ry="3"/>
<circle cx="-45" cy="178" r="10" fill="#111"/>
<circle cx="45" cy="178" r="10" fill="#111"/>
<rect x="-48" y="160" width="12" height="20" fill="#666"/>
<rect x="36" y="160" width="12" height="20" fill="#666"/>
</g>
This adds trucks maybe.
Now cat group:
<g id="cat">
Add helmet outer:
<ellipse cx="0" cy="-30" rx="60" ry="45" fill="#f5f5f5" stroke="#aaa" stroke-width="2"/>
Add visor:
<ellipse cx="0" cy="-20" rx="45" ry="25" fill="#80c0ff" opacity="0.8"/>
Add cat head:
<circle cx="0" cy="30" r="35" fill="#ff9966"/>
Add ears:
<polygon points="-25,-30 -35,-5 -15,-5" fill="#ff9966"/>
<polygon points="25,-30 35,-5 15,-5" fill="#ff9966"/>
But the ear points above might need adjustment: Let's refine ear shapes.
We want ears to be triangular shape attached to head: Replace left ear with polygon points: -20,30 (head's side point), -30,5 (top left), -10,5 (top right). Actually head's coordinate given we need to compute correctly.
Our head center at (0,30). So the left side of head approximate at ( -35,30 )? Actually radius 35, so left side x = -35 (when y=30). Top point of head is at y= -5 where x=0.
Ear tip should go above head top: approximate Y maybe -30 relative group.
Thus left ear polygon points: tip at: ( -20, -30 ), base left: ( -45, -5 ), base right: ( -5, -5 ). Right ear: tip at (20,-30), base left: (5,-5), base right: (45,-5). Or we can reflect.
Will ensure ear base positions align with head shape.
So left ear: <polygon points="-20,-30 -45,-5 -5,-5" fill="#ff9966"/>.
Right ear: <polygon points="20,-30 5,-5 45,-5" fill="#ff9966"/>.
That's fine.
Now add facial features: eyes: two small white circles with black pupils.
<circle cx="-12" cy="20" r="6" fill="white"/> <circle cx="-12" cy="20" r="3" fill="black"/>
<circle cx="12" cy="20" r="6" fill="white"/> <circle cx="12" cy="20" r="3" fill="black"/>
Add nose: small triangle? <polygon points="0,30 3,34 -3,34" fill="pink"/> maybe.
Add whiskers: lines - we can draw three lines each side.
Left whisker lines: <line x1="-5" y1="35" x2="-30" y2="40" stroke="black" stroke-width="1"/>; <line x1="-5" y1="38" x2="-30" y2="45" stroke="black" stroke-width="1"/>; <line x1="-5" y1="32" x2="-30" y2="30" stroke="black" stroke-width="1"/>.
Right whisker lines: similarly symmetrical.
Now add torso rectangle:
<rect x="-30" y="60" width="60" height="80" fill="white" stroke="#ccc" stroke-width="2" rx="8" ry="8"/>.
Add arms: left arm.
<rect x="-45" y="60" width="15" height="55" fill="white" stroke="#ccc" stroke-width="2" rx="5" ry="5"/>.
Right arm:
<rect x="30" y="60" width="15" height="55" fill="white" stroke="#ccc" stroke-width="2" rx="5" ry="5"/>.
Add legs: "feet" rectangles: left foot: <rect x="-30" y="140" width="20" height="20" fill="white" stroke="#ccc" stroke-width="2" rx="4" ry="4"/>; right foot: <rect x="10" y="140" width="20" height="20" fill="white" stroke="#ccc" stroke-width="2" rx="4" ry="4"/>.
Add maybe a chest patch: <circle cx="0" cy="90" r="10" fill="#ffcc00"/> (like a patch).
Or a NASA flag: but ignoring.
Now tear: Let's see the shapes composition.
Now we need to incorporate the group translation properly.
Let's compute the absolute location.
Group transform translate(600,330) positions the cat's origin at that coordinate.
Now check cat/board relative positions in absolute coordinates.
Important to ensure cat's head is above helmet (helmet bottom at y coordinate from group yaw). Let's compute absolute positions:
Helmet outer centered at (0,-30) relative; thus absolute mouth? Actually group origin at (600,330). So helmet center is at (600, 330 - 30 ) = (600,300). That's fine; the cat's head center at (600, 330+30) = (600,360). So head at Y=360. That seems fine.
Now, the cat's torso top at y=60 absolute => (600,390). Torso bottom at y=140 => (600,470). Feet bottom at y=160 => (600,490). Deck top at y=160 => (600, 330+160) = (600,490). So deck top at 490 yes.
Thus cat stands on deck. Deck bottom at y=172? Actually deck height =12 from y=160 to y=172 => bottom at 330+172=502. So deck bottom at 502. That matches the ground near moon surface at Y=500.
So overall cat appears positioned at absolute y ~460 with deck at ~490, near the moon's arc at position (600,500). So cat will be near the moon's surface.
Because the moon center is (400,650) radius 250. At x=600, the surface y coordinate is ~500. Our deck top at y=490 is slightly above surface. Good.
Now the cat is placed inside.
Now the moon's left side will obscure the cat? The cat is on the right side of moon where there is no blocking.
Now we need to set the moon's fill as light gray and also add a gradient for shading? Not needed.
Now we need to ensure any inline CSS as needed? Might not need style; we can just use fill attributes. But for clarity, we can maybe set some CSS for animation for stars or subtle background. Could be static.
Now final assembly.
Add a closing </svg>.
All inside fenced code block with language "svg".
Testing: Ensure no errors, all tags correctly closed.
Now I'll craft final code.
Check each tag for proper syntax.
Let's prepare the final answer.
But the instructions say: "Reply with exactly ONE fenced code block containing the complete file: ```html (or ```svg ...)". Since it's an SVG file, we should use ```svg.
Thus I'll wrap the entire SVG markup inside a fenced code block with language specifier "svg". No additional text before or after.
Testing manually: Probably okay.
One might think about the background: Use <rect width="100%" height="100%" fill="black"/> with overflow hidden? But we used style "background:black". Some browsers may not apply that style to entire SVG? Actually setting style as attribute style on the <svg> element works: style="background:black". However, perceiving the background may be uncertain: The black background will fill the entire canvas. I think it's fine.
Better add a <rect width="800" height="800" fill="black"/> as first element, to be safe.
Do that: <rect width="800" height="800" fill="black"/>.
Set viewBox to same dimensions.
Now need to add star circles on top of it.
Thus final code:
<svg xmlns="http://www.w3.org/2000/svg" viewBox="0 0 800 800" width="800" height="800">
<rect width="800" height="800" fill="black"/>
<!-- stars -->
<circle cx="50" cy="100" r="1.5" fill="#fff"/>
...
<circle .../>
<!-- moon -->
<circle cx="400" cy="650" r="250" fill="#d9d9d9"/>
<!-- craters -->
<circle cx="500" cy="720" r="30" fill="#b0b0b0"/>
...
<!-- cat with skateboard -->
<g transform="translate(600,330)">
<g id="skateboard">
...
</g>
<g id="cat">
...
</g>
</g>
</svg>
Design decisions:
- Use appropriate colors.
- Ensure all shapes are closed properly.
Now answer.
I need to ensure no stray or other characters.
Make sure to close all tags.
Let me write final code.
Alright, produce final answer.
But before final answer, verify some details:
Helmet shape will fill white and stroke. But is it drawn above cat head? The order: we draw helmet outer ellipse first then visor then head. But the head will be behind the helmet because drawn after helmet outer? Actually head drawn after helmet outer will appear on top, covering the helmet interior, which looks like the cat's head emerges from helmet. But that may hide helmet interior shape that would normally be a face grid? Actually typical astronaut helmet is transparent visor; head sits inside, the outline perhaps shows the helmet shape.
Thus we want the helmet outer shape to be drawn around the head, behind the head so head appears in front: Good.
Thus order: helmet outer, visor, head (maybe head visible slightly below visor). However to hide edges of head behind helmet, we need to ensure the helmet shape is drawn behind or as an outline that includes the head.
But currently, if we draw helmet outer then head, the head will be fully visible (overlap) and you'll see drawing of head shape overlapping the helmet shape. The helmet shape includes a white ellipse. The head will be drawn over part of that ellipse, making it look like the head is poking out but more like the head is inside the helmet and would be covered by hardware.
Maybe better approach: draw helmet outer as a thick stroke shape, with no fill (transparent interior), maybe fill with none; then add visor fill; the head will be inside, partially behind visor.
Thus set helmet outer: fill="none" or fill "none", stroke to white? But we want helmet outer to be white? Actually astronaut helmet is white, but the helmet interior visible through visor. So we can mimic by using a white fill with some lower opacity? Or simply a thick stroke of white to represent shape. However, we already draw visor as a blue ellipse partially covering the head. Could adjust.
But keep it simple: we can set helmet outer's fill to "none", stroke = white, stroke-width = 5.
But then you lose white interior of helmet. The interior behind visor may be dark (space). But cat head should be visible inside. The visor will show cat face.
Better: helmet outer ellipse with fill "white" with some opacity to show cat head? Or have the head drawn after helmet interior, but then we want the cat head and ears to be visible through visor. If we draw head after helmet fill, head will be visible but helmet fill might hide head shape behind (if the fill color is same, cannot see). Actually shape overlapping is about order: first rendered shapes are underneath later shapes. If helmet outer shape is drawn first with fill white, then head drawn later will be drawn on top (covering white), which still shows head, not covered. But we want the helmet outer shape to be drawn as a white shape behind head. That works. The visor drawn after may partially overlay head for the face.
Thus ordering: helmet outer (fill white), visor (fill blue partially covering front face), head (drawn after these? Actually visor should overlap head front part, not the entire head; thus head drawn before visor would be partially covered by visor if visor drawn after. But if head drawn after visor, it will cover visor entirely, which is not correct.
We want head visible under visor partly (like the front of head). The visor covers (in front) the head's face area. So we need to draw head first, then visor on top of head to simulate visor covering the front of the head. However we also want helmet outer to be behind both head and visor, so helmet outer drawn first.
Thus order: rocket:
- Helmet outer ellipse (fill white)
- Head (which is inside the helmet)
- Visor (drawn on top, partially covering head facial features)
We also want ears maybe before or after helmet; they are inside helmet but some ear might be behind visor? Keep before visor.
So ordering: helmet outer, ears, head, visor (which overlaps head). But ears maybe drawn after head? Actually ears are above head topology; but they are within helmet; reading order may not be critical.
But we need to adjust drawing to achieve the intended look.
Thus best ordering: helmet outer -> head -> visor, but ears maybe drawn after head but before visor? Hard to decide.
Simplify: use group but manually order shapes.
Alright.
Now cat's face features: eyes and nose after subtract? If we draw head first and then eyes, then visor will sit in front after head; we might want visor drawn after eyes? Actually real visor is transparent covering the face, so eyes and nose are behind visor. So we want visor on top of eyes and nose, except portions of visor may be translucent. So we want visor after eyes and nose? Actually we want visor covering eyes and nose, but maybe slightly transparent (opacity 0.6). So we draw eyes and nose then visor (with opacity causing some behind to be visible). But if visor is drawn after, it will overlay edges. That's fine.
Thus order:
1. helmet outer ellipse (white fill, stroke)
2. head circle (orange)
3. left ear, right ear as polygon (maybe after head, but attaches to head, could be drawn then head; but whichever, it's not critical.)
4. eyes (white circles, black pupils)
5. nose triangle
6. whiskers lines
7. visor ellipse (blue with opacity 0.6) drawn last to appear above those features but slightly transparent.
Alternatively, we could draw visor before eyes to be behind? Let's think: If we draw visor after eyes, then the blue visor will cover the eyes (like the visor is tinted), but we might want eyes to be visible through visor? In astronaut helmets, you can see the astronaut's face through visor, not blocked by visor. So the eyes should be visible through visor. So better to draw visor before the eyes (so eyes appear on top). And we can set visor fill with some translucency such that underlying head color is less visible behind. But if visor is drawn first, then eyes appear on top of it (i.e., not tinted). To simulate visor tinted, we could draw visor first with some opacity and then draw eyes after with normal colors, but that will not show tinted effect (the eyes will be fully visible). But perhaps the tinted effect is optional.
Simplify: maybe we don't need visor tinted, just make visor outline.
Simplify further: we can make the helmet consist of an ellipse with a transparent interior (no fill), a thick white stroke, and the visor as a blue shape with lower opacity. Then we draw head inside. This may be sufficient.
Thus we will use helmet outer as <ellipse ... fill="none" stroke="white" stroke-width="4"/>.
Thus interior will be empty, so head appears as is and is visible; visor is drawn as a blue shape with some opacity, overlaying some of head but still visible.
Better: no need to consider complex layering, simply draw head, then helmet outer, but that would hide head. So using fill none with stroke will not hide head.
Thus final structure:
- Head (cat, orange)
- Ears (maybe after or before)
- Helmet outer ellipse (stroke white)
- Visor (filled with translucent blue maybe with some transparency)
- Then eyes, nose, whiskers drawn over head behind visor? However eyes should be visible. If visor on top, maybe draw visor with some opacity, and eyes drawn before that would be overlayed by visor partially but still visible partially. Let's not worry too much.
Simplify: draw head, ears, then eyes, nose, whiskers, then helmet outline and visor. The visor will be above those features but transparent enough to see them. That would be fine.
Alright.
Now final design plan:
Component ordering:
- background rectangle
- stars
- moon
- craters
- skateboard (deck, trucks, wheels)
- cat group:
- head (orange circle)
- ears (polygons)
- eyes (white circles and black pupils)
- nose (pink triangle)
- whiskers (lines)
- helmet outer (ellipse with no fill, white stroke)
- visor (ellipse filled with light blue, some transparency)
- torso rectangle and arms
- feet rectangles
- chest patch (optional)
But the torso may be drawn behind the helmet? Possibly, but not needed.
Make toros rectangle after helmet? The helmet sits above head; the torso is lower down. So torso drawn before helmet or after? The order can be flexible. Let's decide: Draw torso before head maybe or after? It doesn't intersect. Drawing order does not cause overlap with helmet.
Thus final order: maybe first draw lower body (torso, arms, feet) then head, ears, eyes, nose, whiskers, helmet, visor.
But we want helmet to not cover the torso; that is fine.
Now ensure the shapes have appropriate fill.
Now let's write the final code.
One more check: The group transform includes the whole cat + skateboard group; we must ensure that the group origin aligns such that cat appears on top of deck. Already done.
Now writing the final SVG.
Consider overall size and viewBox.
Set viewBox "0 0 800 800". width=800 height=800 (but the sandbox may impose responsiveness automatically). Use style "background: black;" to ensure black background. But we can also use a black rectangle, which improves initial paint.
I'll go with a black rectangle.
Now incorporate stars: I'll add about 30 stars randomly.
Then add moon: a large circle.
Add crater circles: maybe three.
Add cat+board as described.
Set stroke colors as needed.
Now ensure that all elements have closed tags and correct coordinate references.
Now produce final answer.
After writing final code:
We should test the code mentally for syntax errors:
- The <svg> root includes proper xmlns attribute.
- Use <rect width="800" height="800" fill="black"/> correct.
- For feed mix: ensure each <circle> self-closes: <circle .../> is correct.
- <polygon> properly self-closed.
- <line> self closed.
- <ellipse> self closed.
- <g> group.
- <rect> etc.
Now final answer will be inside a fenced code block with language "svg". Let's prepare final code block.
Potential improvements: add <title> for accessibility.
Now final answer.